 |
| Sponsored post* |
Pumpkin Whoopie Pie & Cream Cheese Frosting Filling (Makes 24)
Ingredients
2 cups packed brown sugar
1 cup vegetable oil
1&1/2 cups pure canned pumpkin
2 eggs
3 cups flour
1 teaspoon salt
1 teaspoon baking powder
1 teaspoon baking soda
1 &1/2 teaspoon vanilla extract (dividied)
1 &1/2 teaspoons ground cinnamon
1 teaspoon ground ginger
1 teaspoon ground cloves
8 ounces cream cheese (softened)
1/4 cup salted butter (softened)
1 cup powdered sugar
Instructions
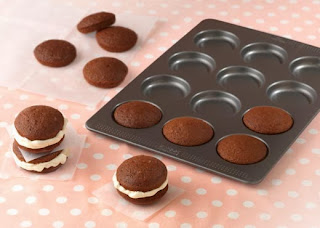
1. Preheat oven to 350 and spray the Good Cook Whoopie Pie Pan with oil.
2. Combine the oil and brown sugar. Mix in the pumpkin and eggs, beating well. Add the flour, salt, baking powder, baking soda, 1 teaspoon vanilla, cinnamon, ginger, ginger, and cloves.
3. Fill each whoopie pie insert to the top. Bake for 10-12 minutes. Let cool completely.
4. Cut each whoopie pie in half horizontally (if you would prefer to put two cooked whoopie pies together instead, only fill each insert before baking 3/4 way).
5. Make filling by beating together cream cheese and butter until creamy. Mix in the vanilla and sugar.
6. Fill each whoopie pie with cream cheese mixture.
Review: I have tried to make whoopie pies in the past by just scooping dough mix onto a baking sheet and it was a bit of a disaster. The whoopie pie pan made it so easy! I was not sure how much to pour into the inserts and ended up over filling them. However, this worked out well because I simply cut them in half and ended up saving time by having to bake less! A little bit of oil spray and the cakes came out of the pan great and it was a breeze to clean. They were cooked very thoroughly and the recipe turned out amazing. I will never make whoopie pies again without this pan and since it comes with a lifetime guarantee I won't have to worry about ever having to go back to my old method!
Buy it here: You can purchase the Good Cook Whoopie Pie Pan on the Good Cook website.
*I was provided with the above mentioned product for the purpose of facilitating this review. All opinions expressed are my own.


0 comments:
Post a Comment