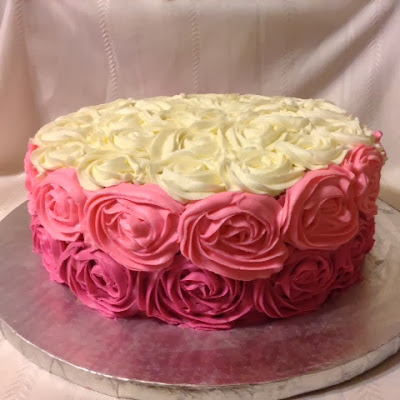
This Rose Cake may look complicated, but it is actually very easy to make! In fact, it took me far less time to make this as compared to other cakes and it looks amazing when it is done. Here are some step-by-step directions for you!
1. Bake and fill a round cake. I used a 10" pan but you can make it as small or as large as you need. I suggest baking two cakes and cutting each in half horizontally so you have triple the filling. Not only does this make for a super delicious cake, but it also helps to add some height which is important for this cake. If you need help with flattening and cutting the cake for filling, please see my tutorial page.
2. Make a double batch of buttercream icing. You will need to a medium consistency so you will need to add an extra 1/2 tablespoon of milk.
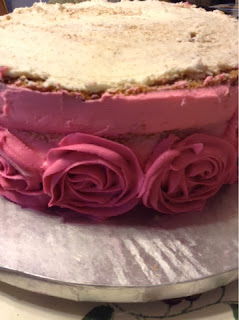
3. Divide the buttercream into three bowls and color your frosting. The cake looks great if you have a dark color on the bottom, a lighter shade of the color in the middle, and then an even lighter or white color the top. Dirty ice/crumb coat the cake using the frosting you colored.
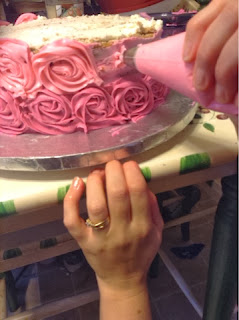
3. Put the darkest buttercream in a decorating bag with attachment 2D tip.
4. Start at the bottom of the cake, about 1/4 of the way up. Squeeze icing out in a circular pattern, spiraling until you reach the bottom edge of the cake. Continue to create the roses along the bottom of the cake. Continue decorating the side cake using the lighter color so that the roses take up the second half of the side of the cake. (It helps if you can decorate on a Tilting Turntable ). Continue decorating the top of the cake with the lightest/white buttercream.
1. Bake and fill a round cake. I used a 10" pan but you can make it as small or as large as you need. I suggest baking two cakes and cutting each in half horizontally so you have triple the filling. Not only does this make for a super delicious cake, but it also helps to add some height which is important for this cake. If you need help with flattening and cutting the cake for filling, please see my tutorial page.
2. Make a double batch of buttercream icing. You will need to a medium consistency so you will need to add an extra 1/2 tablespoon of milk.
3. Divide the buttercream into three bowls and color your frosting. The cake looks great if you have a dark color on the bottom, a lighter shade of the color in the middle, and then an even lighter or white color the top. Dirty ice/crumb coat the cake using the frosting you colored.
3. Put the darkest buttercream in a decorating bag with attachment 2D tip.
4. Start at the bottom of the cake, about 1/4 of the way up. Squeeze icing out in a circular pattern, spiraling until you reach the bottom edge of the cake. Continue to create the roses along the bottom of the cake. Continue decorating the side cake using the lighter color so that the roses take up the second half of the side of the cake. (It helps if you can decorate on a Tilting Turntable
5. If there are any small gaps, make a star with the same 2D tip in these gaps by simply squeezing then releasing the icing.
I told you it was easy!!


.JPG)


0 comments:
Post a Comment